Color grading
Select a visual clip and open its color controls in the inspector.
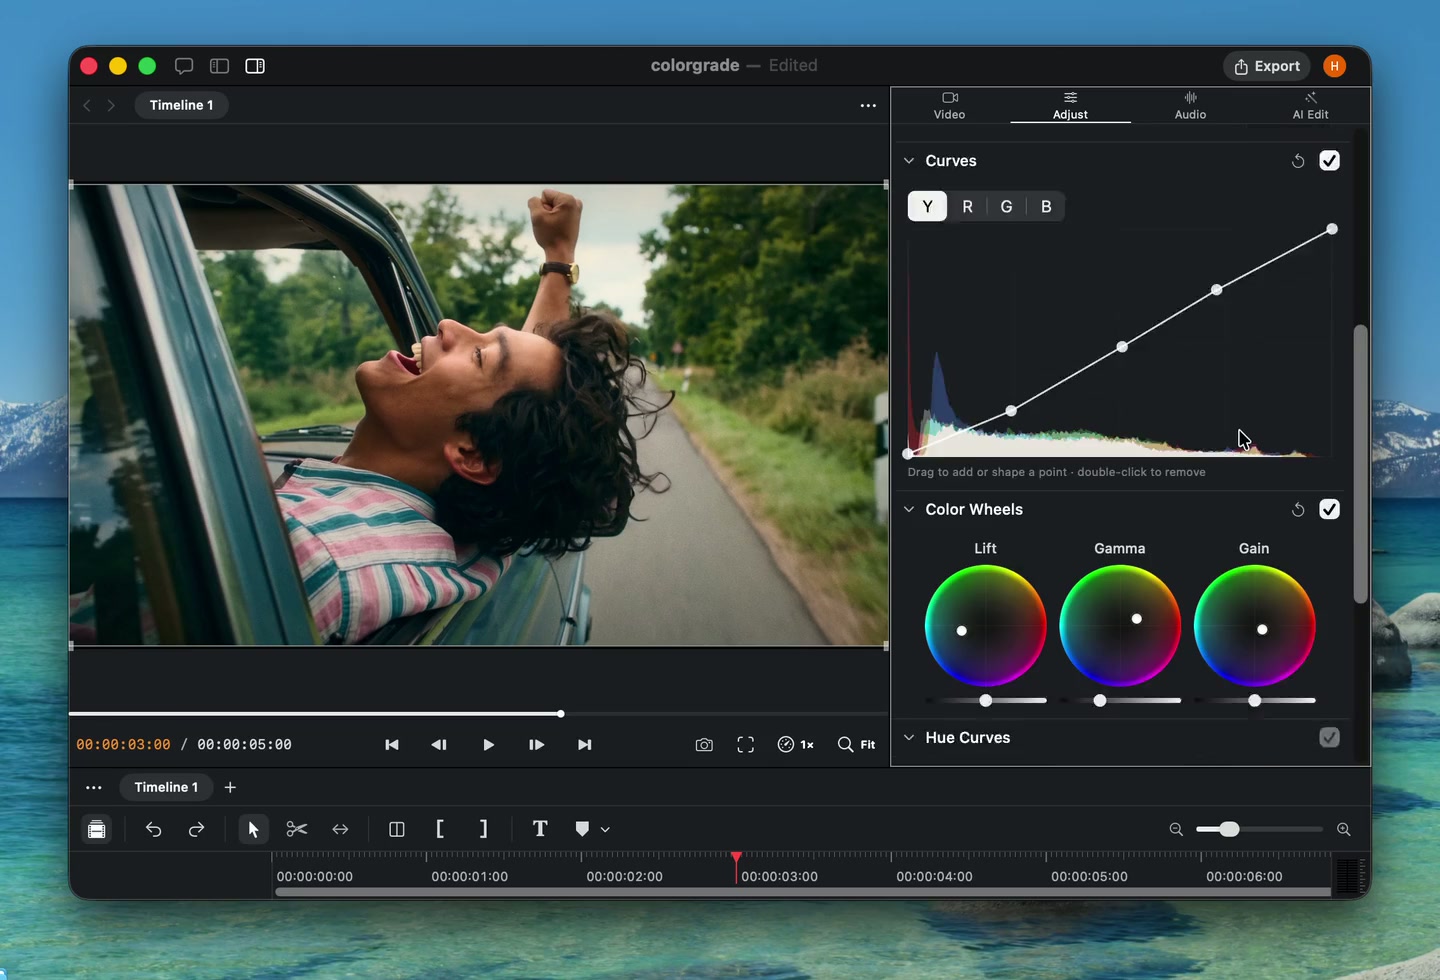
Primary controls
Use exposure, contrast, temperature, tint, saturation, shadows, highlights, whites, and blacks for broad corrections.
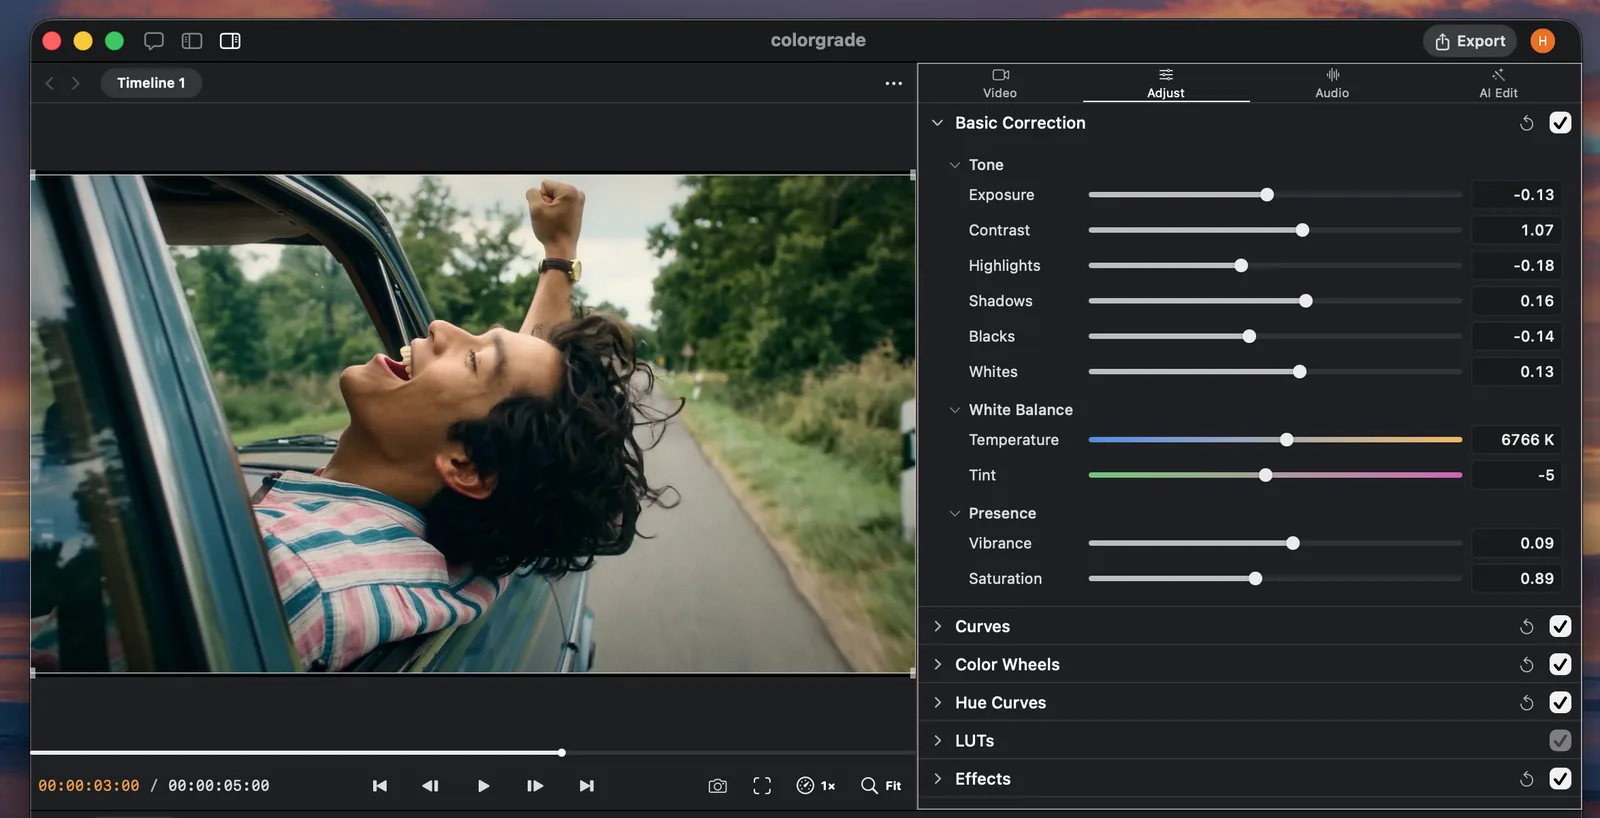
Curves and color wheels
Curves provide precise tonal control. Color wheels let you push shadows, midtones, and highlights toward different hues.
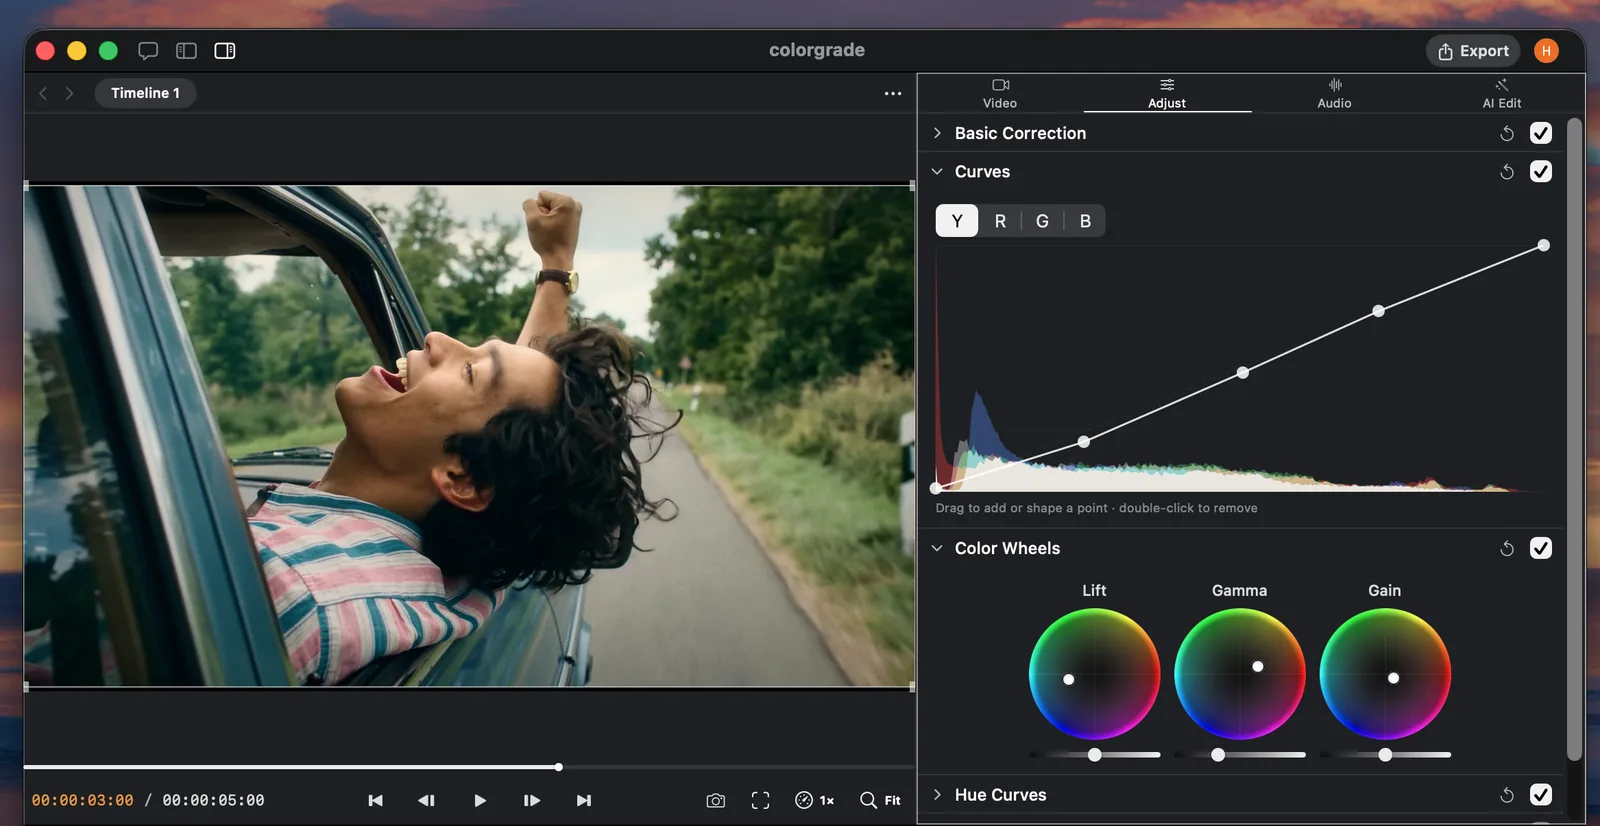
Hue curves
Hue curves are secondary color controls. Instead of changing the full image, they target pixels based on their existing hue.
The horizontal axis represents the color spectrum and the center line is neutral. The histogram behind the curve shows which hues are present in the current frame. Drag to add or shape a point, then double-click a point to remove it.
- Hue: Shift a selected color toward another hue, such as moving a cyan sky toward blue.
- Sat: Increase or reduce the saturation of one color range.
- Luma: Brighten or darken one color range.
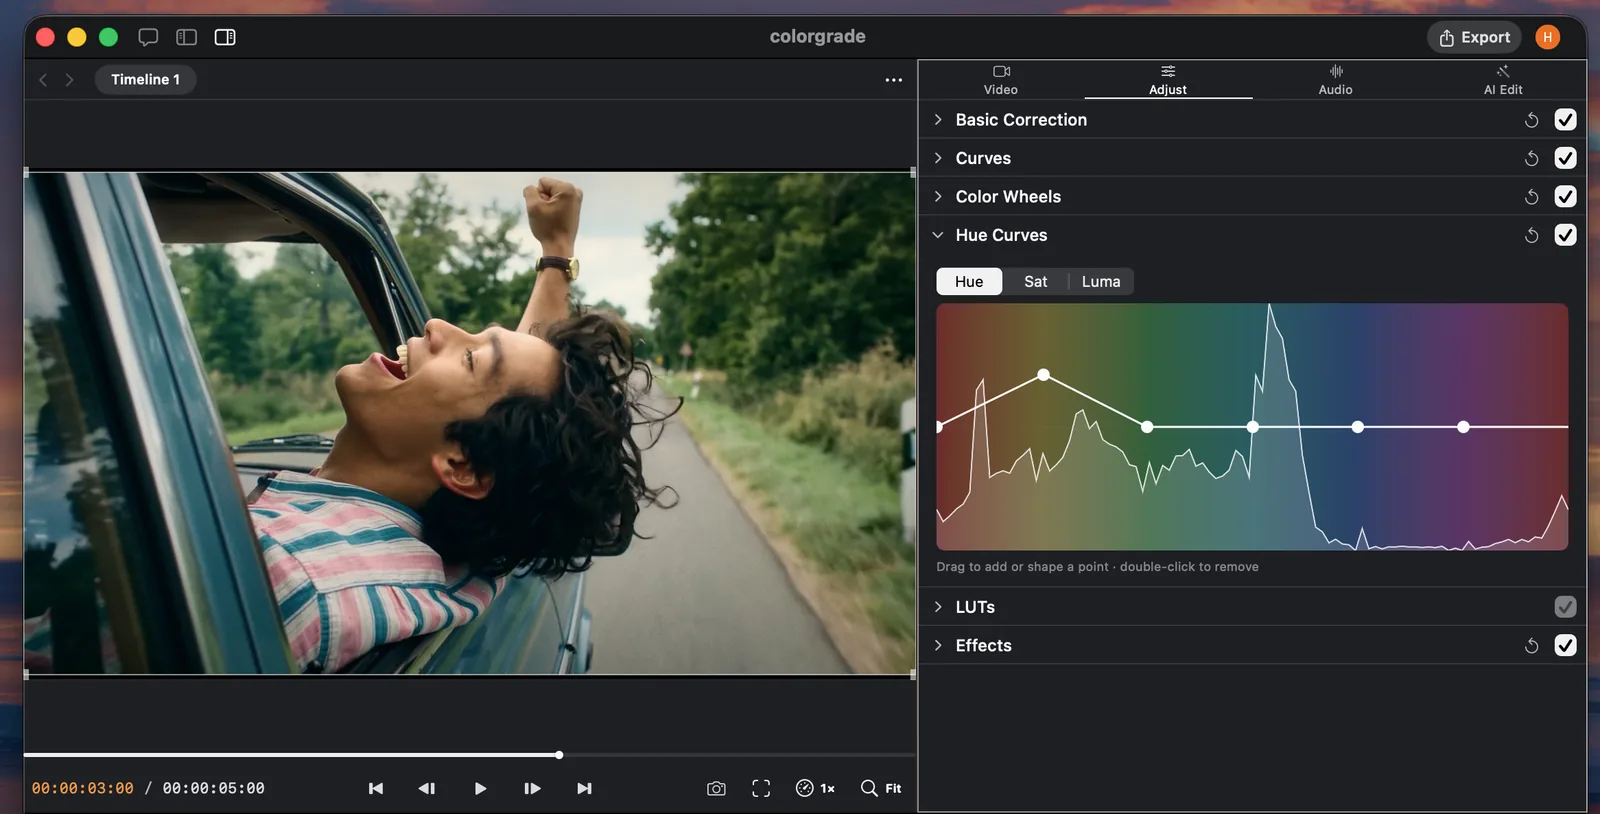
LUT
A LUT, or lookup table, is a fixed color transform. It maps the input red, green, and blue values of every pixel to new output values.
Palmier supports 3D LUTs in the .cube format. A technical LUT can convert footage from a camera profile into a display color space, while a creative LUT applies a specific visual look.
A LUT does not analyze or correct the footage before applying its transform. Adjust exposure and white balance first so the source matches what the LUT expects.
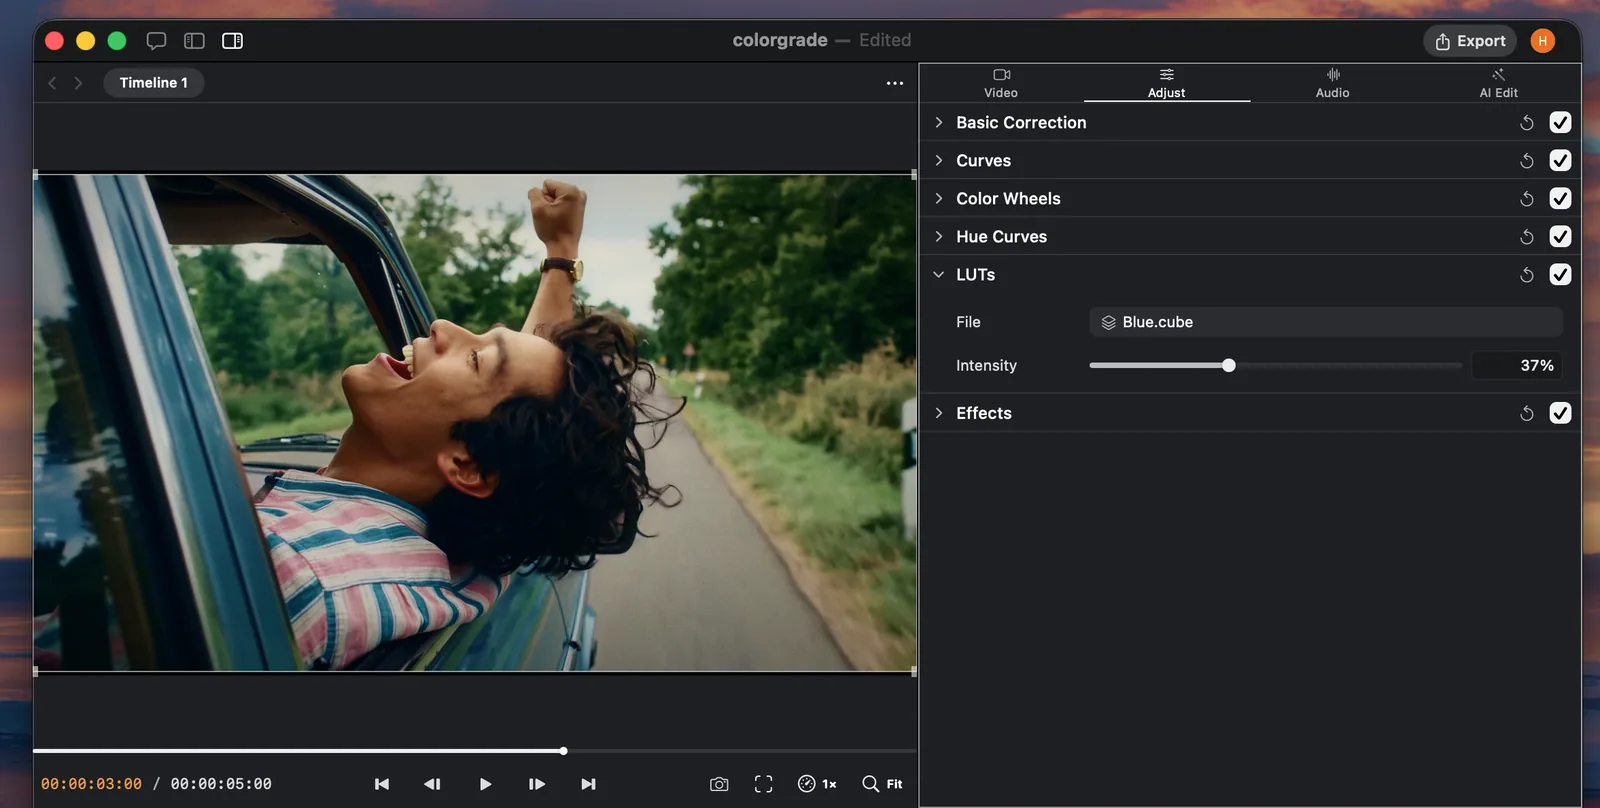
LUT strength
Choose a .cube file, then use Intensity to blend the transformed result with the underlying grade. Use 100% for the complete transform or reduce the intensity for a subtler look.
Palmier stores a copy of the LUT inside the project so it remains available when the project moves.
Effects
Effects remain editable in the inspector and can be copied to compatible clips.
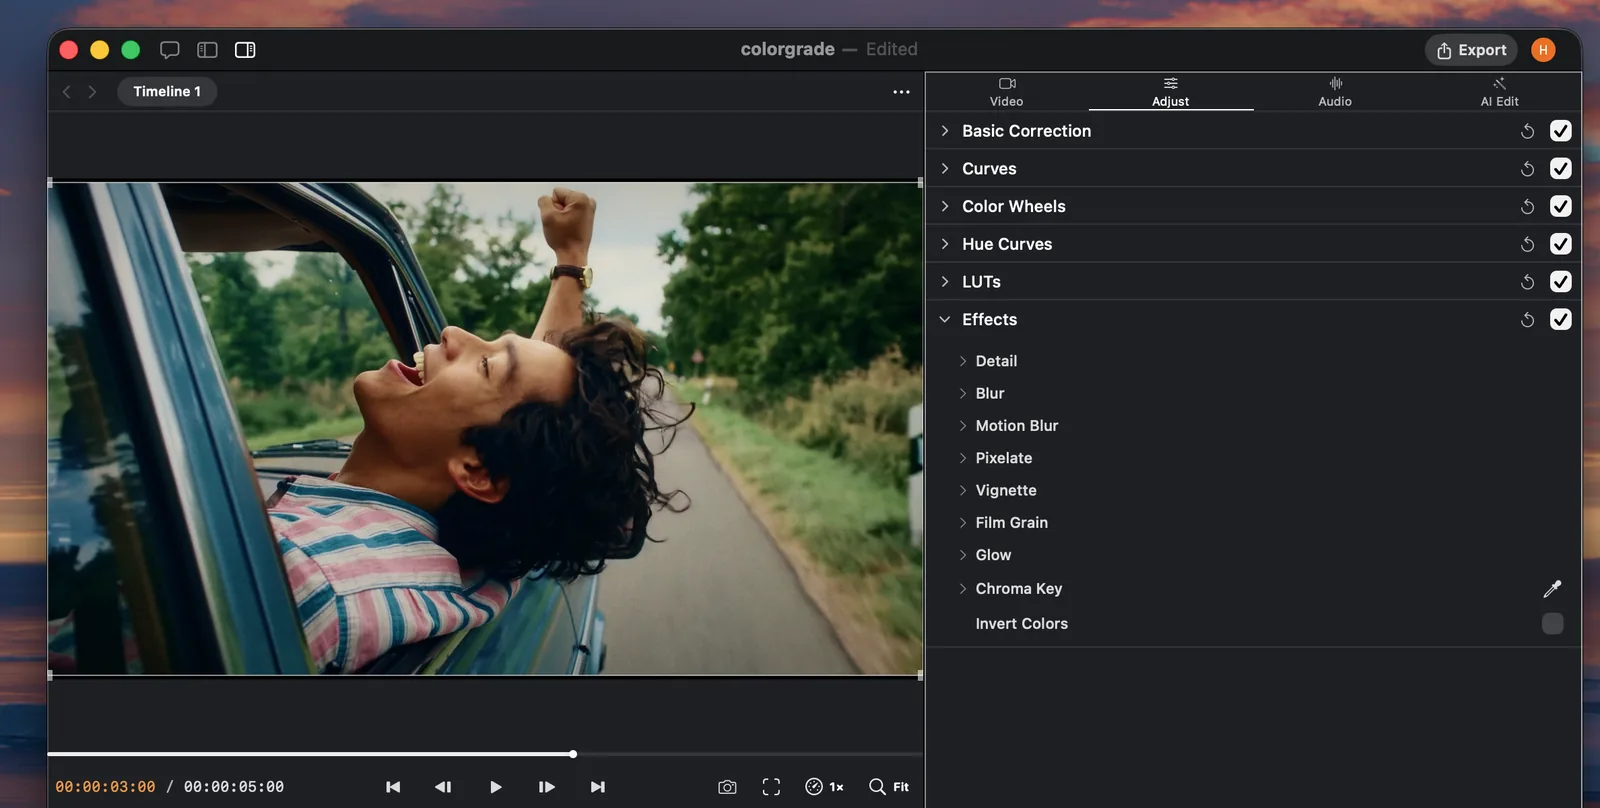
Available effects
- Sharpen: Increase edge contrast to make detail appear crisper.
- Noise Reduction: Reduce visible image noise.
- Clarity: Increase or soften local contrast around details.
- Dehaze: Cut through haze or add a softer atmospheric look.
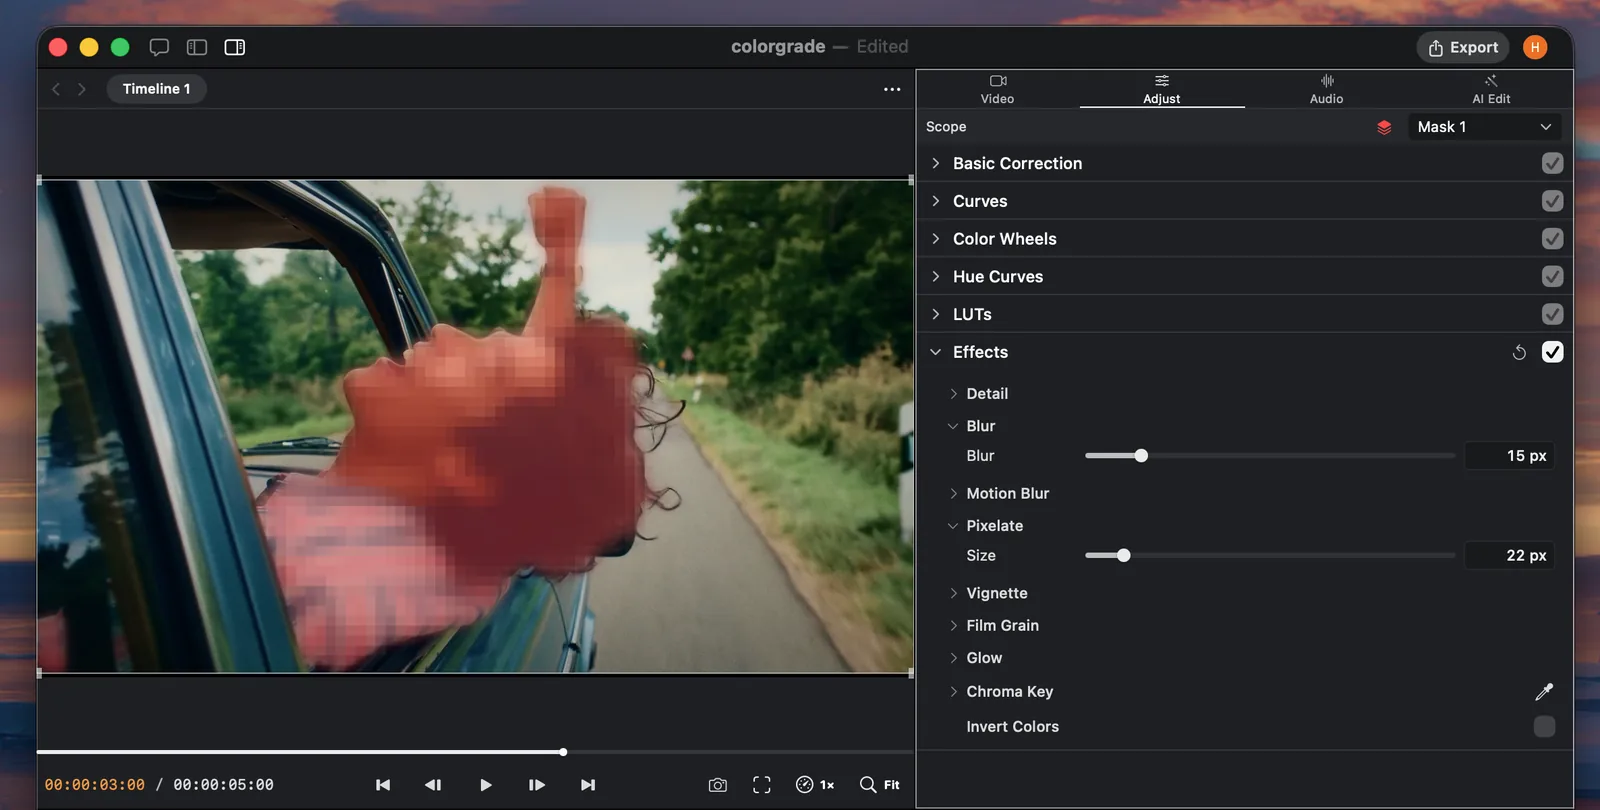
- Blur: Apply an adjustable Gaussian blur.
- Motion Blur: Blur along a chosen direction and amount.
- Pixelate: Replace fine detail with larger square pixels.
- Vignette: Darken or brighten the frame edges with midpoint, roundness, and feather controls.
- Film Grain: Add adjustable grain amount and size.
- Glow: Bloom bright areas with intensity, radius, threshold, and warmth controls.
- Invert Colors: Invert the image colors with one toggle.
Masks
Masks limit a color grade or effect to a selected part of the image.
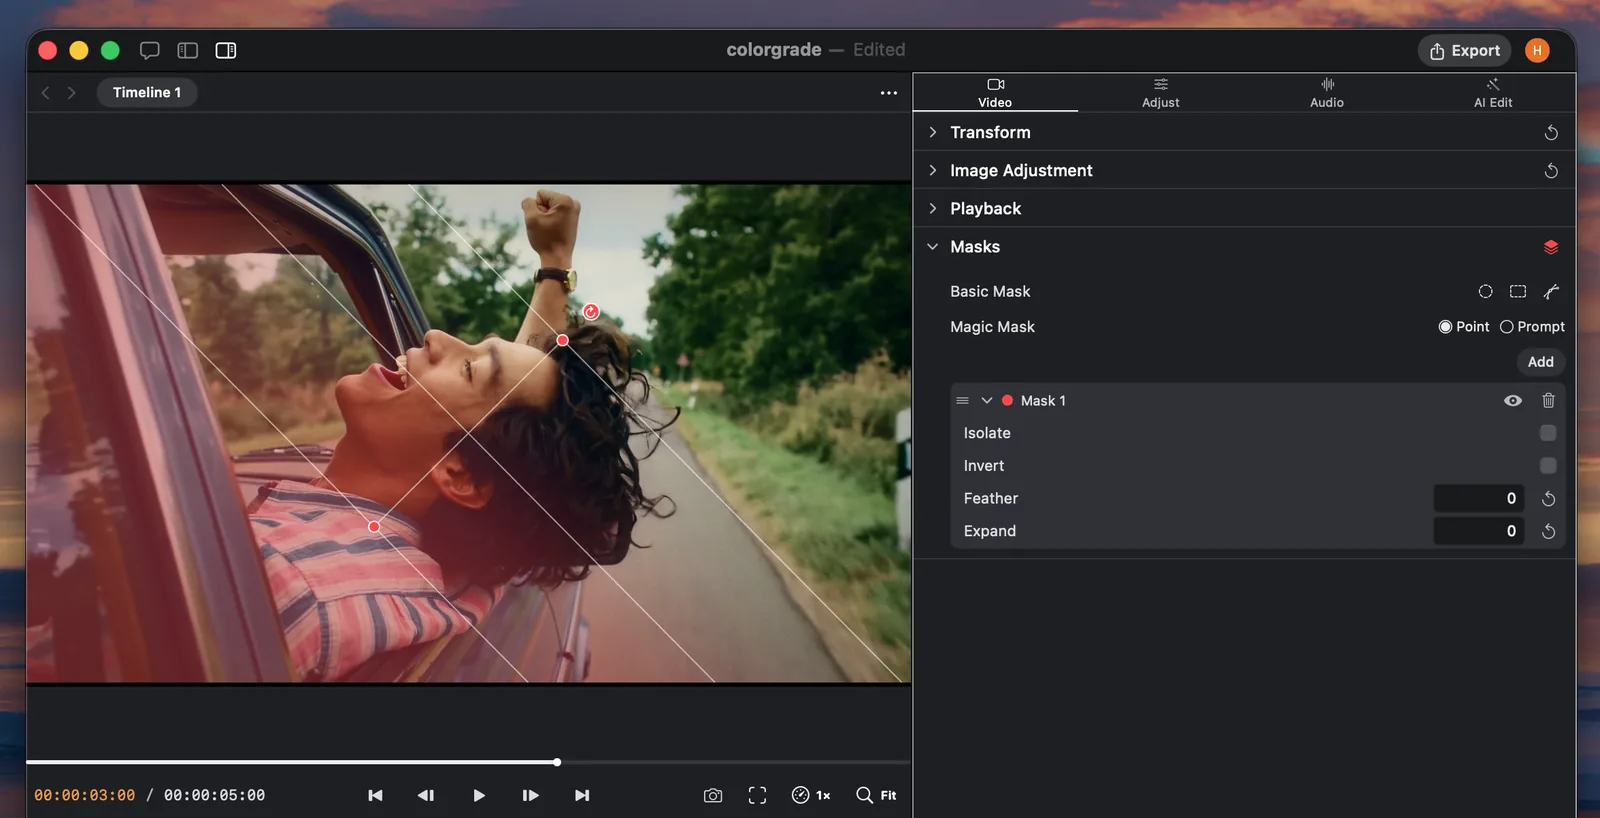
Basic masks
Use ellipse, rectangle, and linear masks for simple geometric selections. Adjust feather and expansion to soften or extend the result.
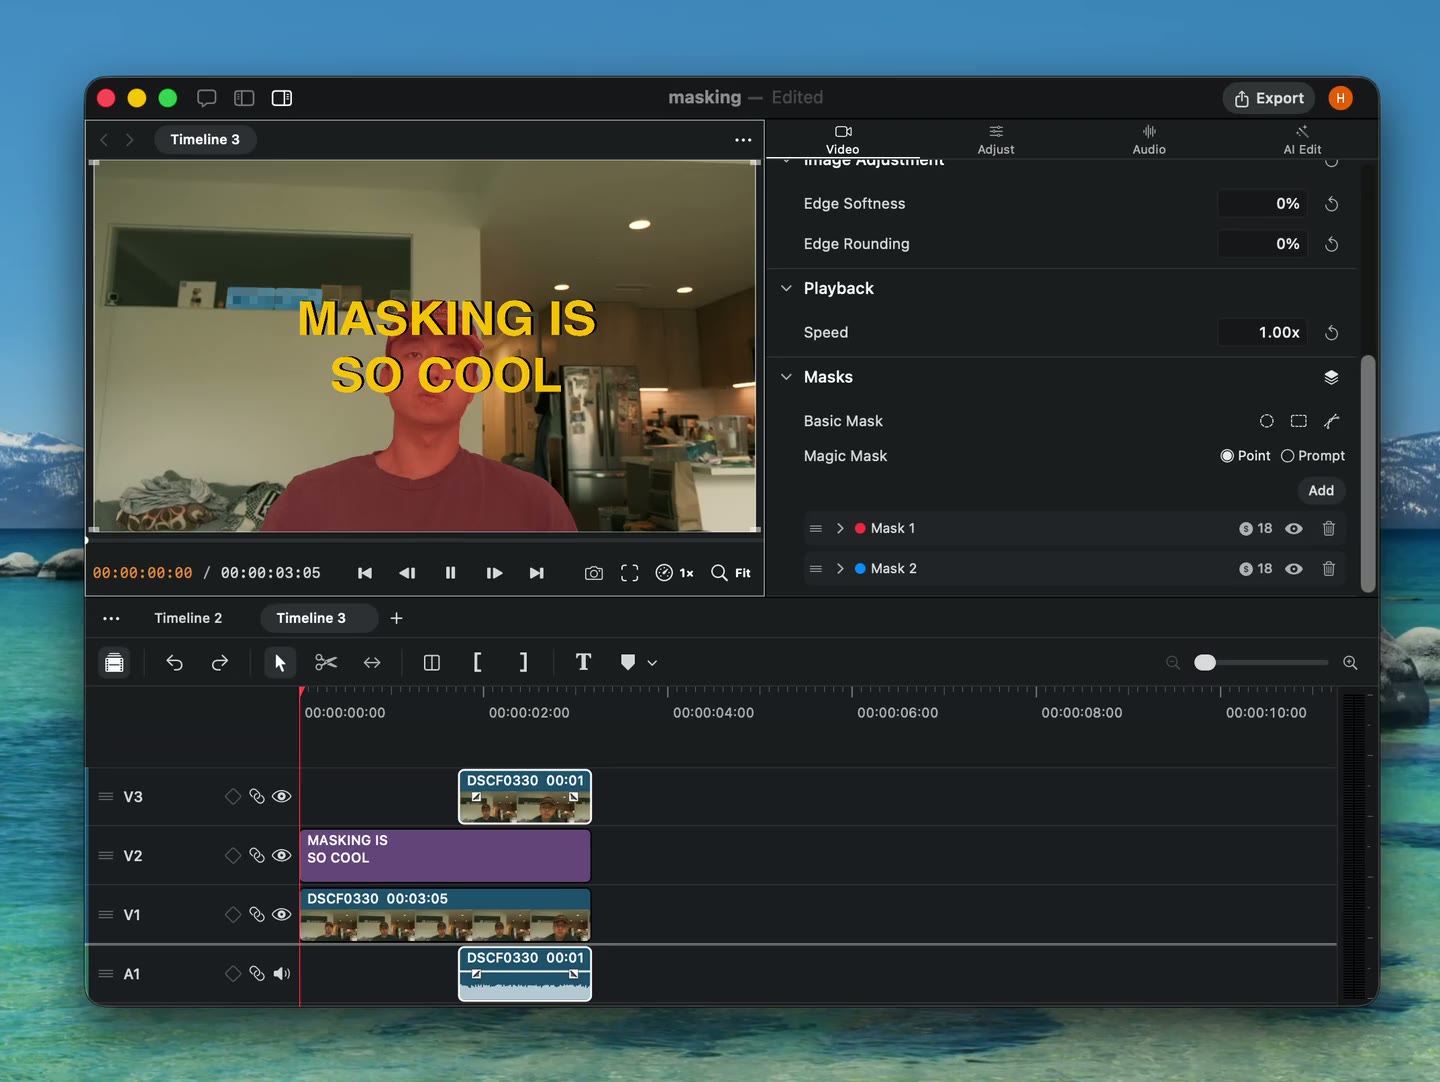
Magic Mask
Use Magic Mask to identify and track an object through a video. Describe the objects that should remain inside the mask.
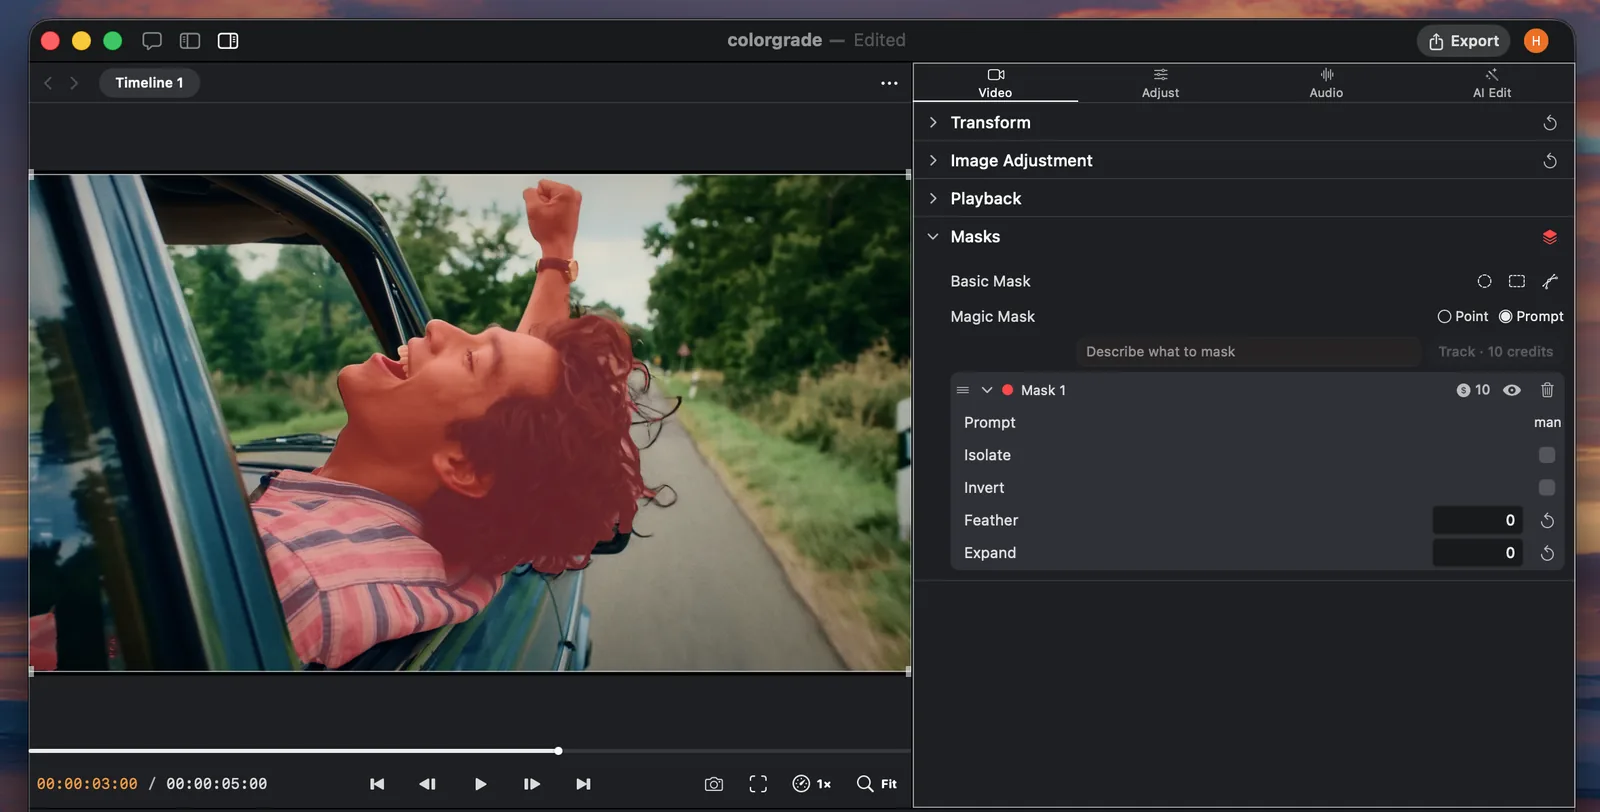
Per-mask effects
Apply color and effects to a mask without changing the rest of the clip. Invert a mask when the adjustment should affect everything outside it.
Chroma key
Choose a key color from the canvas, then adjust tolerance, softness, and spill suppression.
Refine the key
Start with the eyedropper, increase tolerance until the background disappears, then add softness and spill suppression only as needed.